Föregående 1 2 3 4 5 6 7 Nästa |
Hem |
|
Building a Pretty Little Computer 2. Putting it together Keeping dust out |
|
|
|
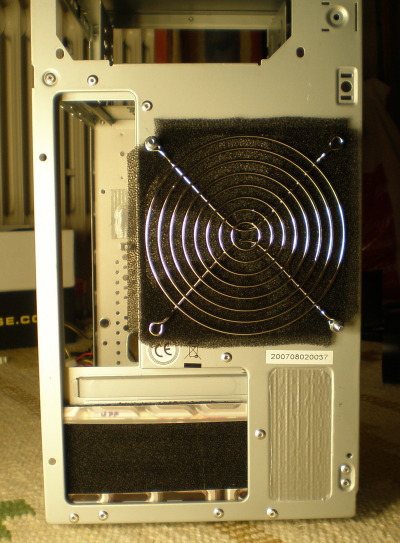
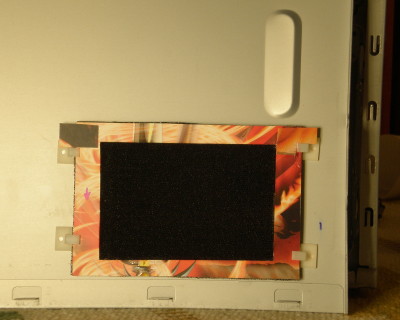
| Three intakes for air, fitted with easy accessible dust filters. This sort was very thin so I used double layers. An extra gust for the GPU through unused PCI-slots. | |
| Interior |
|
|
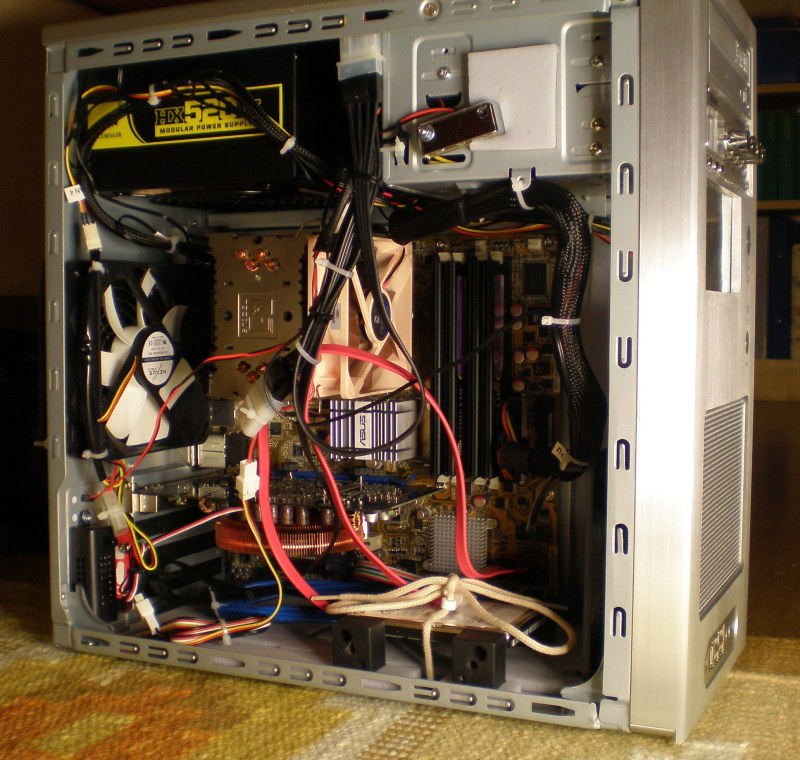
Yes, I know, no cables are supposed to be seen in pictures like this, but there is not many places to hide them
in this small case. Especially not, since I removed the drive cage. Besides, I don't think it is that important
to hide cables that don't obstruct airflow.
Actually, I have added some obstruction (after this picture was taken) to those cables in the middle front, in order to prevent the front exhaust fan from drawing air directly from the side intake. |
| Airflow |
|
|
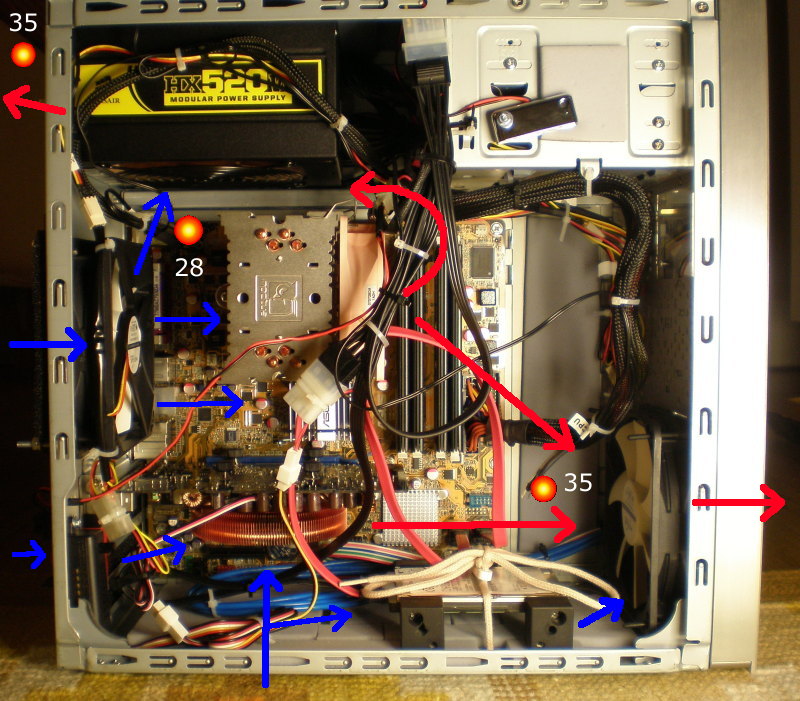
Airflow pattern in this setup, is something like this, I guess . The three yellow/red spots represents
temperature sensors and the numbers the temperature they report under load (all fans at 5V, ambient 23°).
I have made a somewhat strange observation considering airflow in this case. It's often stated in reviews and articles that tower heatsinks with fans that blow parallel to the motherboard, don't cool the components around the CPU-socket (eg Northbridge). However, in this setup, no other fan has such immediate impact on motherboard temperature as the CPU-fan. If it's speed is increased with a tiny 100rpm the system temperature drops a couple of degrees in a few seconds, actually more than CPU-temp. Unfortunately, I don't know where on the motherboard, that sensor is located. |
| Starting up for the first time | |
|

|
|
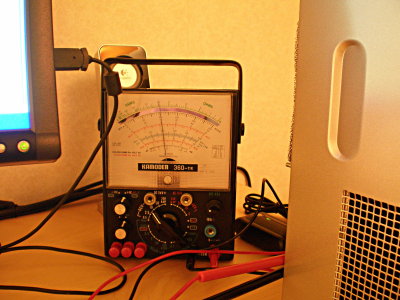
Checking output from fan control in PSU, stable at 3.8V, so far so good. I will continue
monitoring the PSU output for a while, to be sure.
With drive cage removed, there's nothing left to hold the floppy drive covers. A piece of clear plastic in their place and I got myself a nice window. Well, I did whish some bling-bling. Perhaps this is too much, but what the heck, I am a child and Christmas isn't far away. I hate this automatic digital camera. It's impossible to prevent it from turning up ISO-value to max in weak light, giving noisy pictures like this. |
|
|
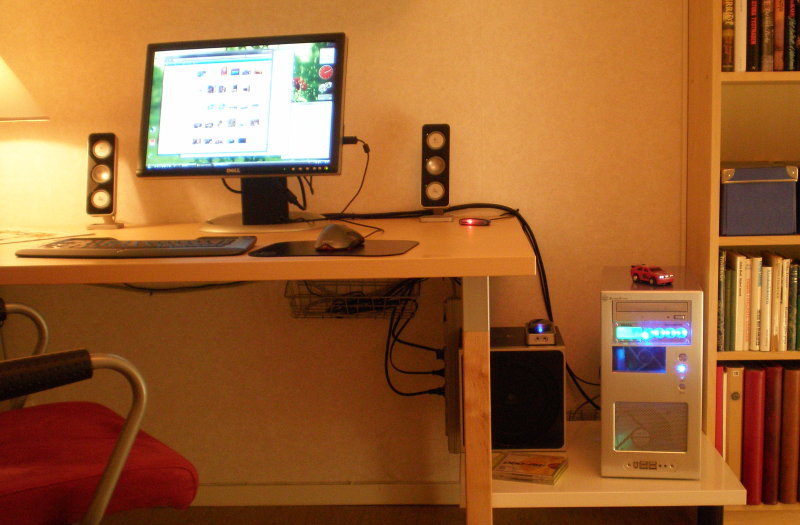
Finished
Windows Vista is installed and running. Time to turn down fans, look at temperatures and listen for noise. |
|
|
Temperatures
Ambient temperature during testing was 23° C. All fans were running at 5V. |
|
|
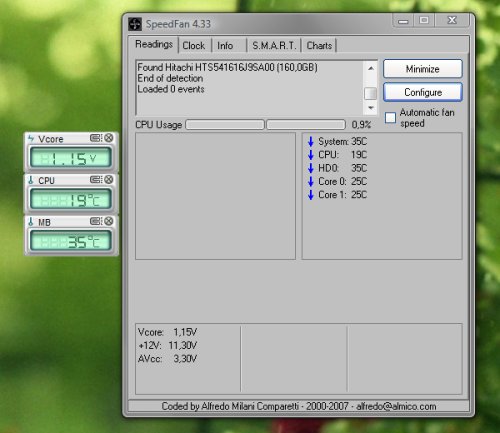
Funny CPU temperature
As you can see, I have build myself a refrigerator. CPU temperature 4° below ambient. Asus PC Probe and SpeedFan showing the same value. Seriously, that sensor isn't very correct. However, values shown by SpeedFan, for the differnt cores, are a bit more realistic. I will refer to them in the future. I don't know where SpeedFan got those 11.30V from, BIOS is showning 12V. |
|
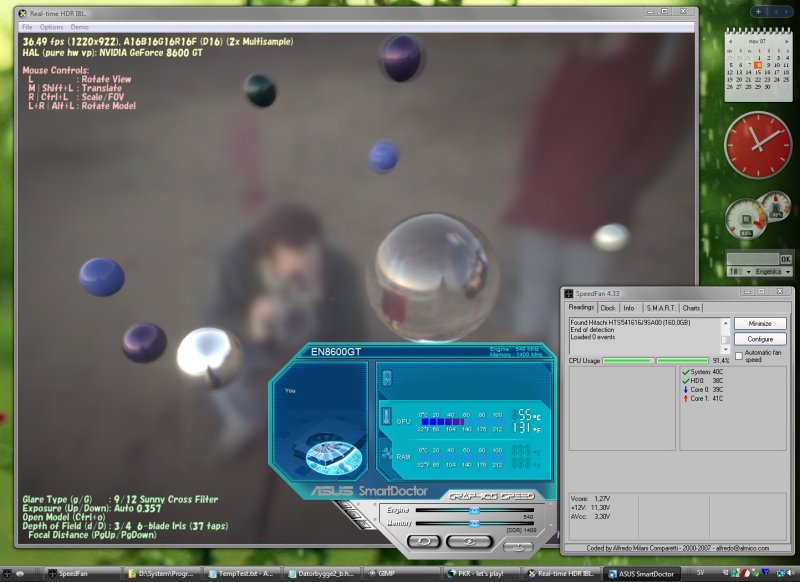
| Load testing was accomplished running RTHDRIBL at about 30 FLPS. To handle that situation the CPU only has to work at 50% load. In order to reach near 100%, some poker clients were added. It was left running until all temperatures had been stable in 30 minutes. In real life, however, I will hardly reach continuous loads above 50%. |
|
|
|
Postscript, wrong CPU-temps: When I wrote that, I wasn't aware that SpeedFan reported 15° too low values for the on-core thermal sensors. Perhaps, this new CPU-values seem a bit high, but then you must keep in mind, that they come from core sensors, not from some simple thermal diode on the motherboard and that they are related to tJunctionMax, which is 100° for this processor, so it's still pretty cool.
|
|
Finally, the big question:
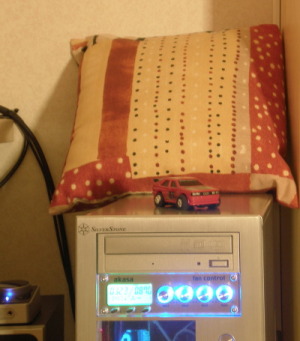
Is the damned thing silent? Yes, my expectations are fulfilled to great extent. No, at late nights, some turbulence noise can be heard. Yes, with this pillow in place, I would say it's inaudiable. |
|
Föregående 1 2 3 4 5 6 7 Nästa |
Hem |